Water Turbine Project Science Experiment
20,350.00 ₨
This Water Turbine Project hydroelectric power generator has many possibilities for a school science fair project. Here are a few independent variables that can be adjusted in an experiment
- Gear ratio — I have included four different gears for the generator and turbine to try
- Load resistance — Drive a set of resistors ranging from 1 Ohm to 1 kOhm
- Water flow rate
- Water height
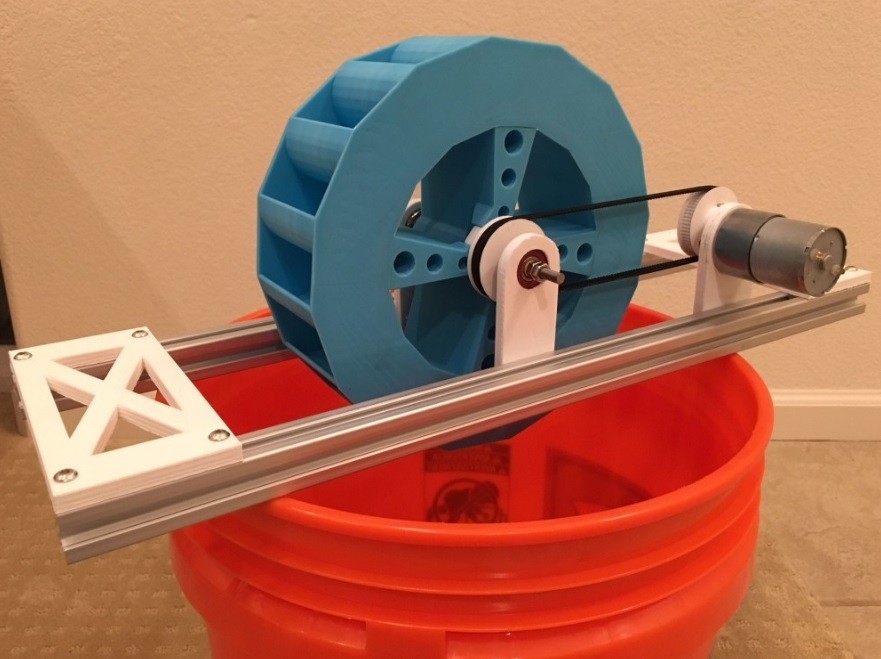
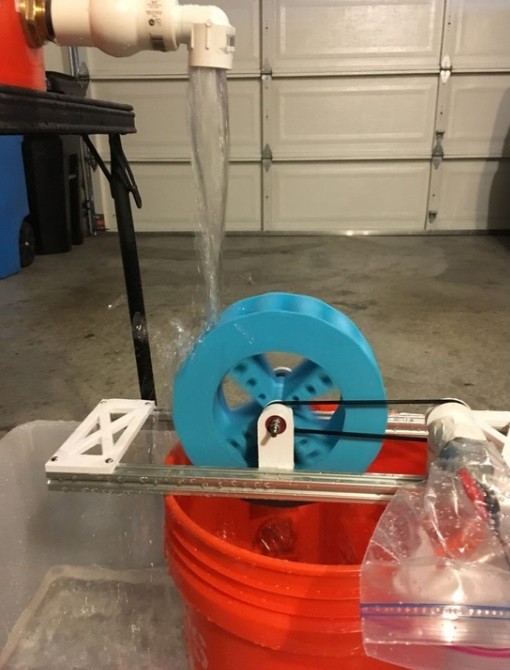
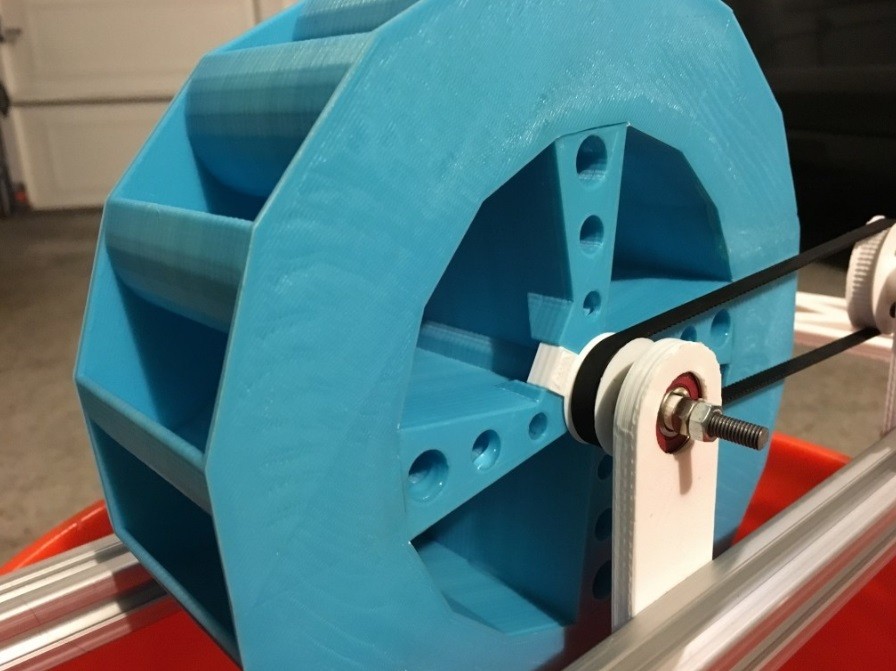
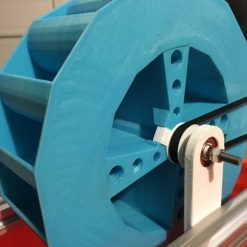
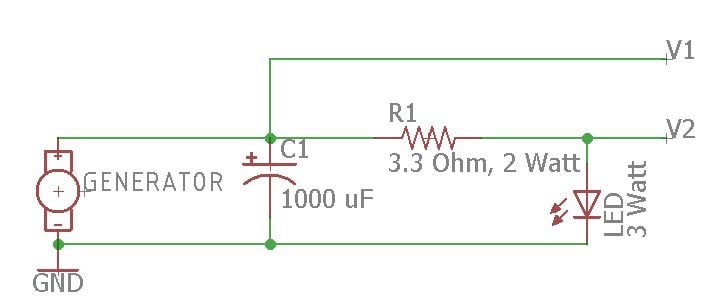
As a science fair project, the experiment plan and procedure is left open ended, to be designed by the student. A typical experiment might be to hypothesize on the power generated as a function of water bucket height, and then measure the relationship. A 3W LED is suggested as a power load, but this can also be left to the student. If choosing a different load, it is suggested that the load be sized to consume no more than a few Watts of power, and have at least 3 ohms of resistance. Higher resistance and lower power loads can also be used, and can be helpful in studying power transfer. Once the turbine parts are printed and other materials acquired, the turbine can be assembled (as pictured) in less than an hour. Accurate measurement is key to a successful experiment. Generator current and voltage can be measured with a set of two multimeters (one used in series to measure current, and the other measuring voltage across the generator leads). A more accurate measurement can be made with an oscilloscope if one is readily available, as modern oscilloscopes typically are capable of calculating average voltage over a fixed period of time (e.g., 10 seconds). ** Caution:** This experiment combines both water and electricity, and while the electricity generated is not enough to cause physical harm, the water is certainly capable of damaging the motor or test equipment. Protect the motor by wrapping it in plastic held in place with duct tape or rubber bands. Also, keep multimeters and oscilloscope away from the turbine by using long lead wires. An example load circuit and measurement locations are shown in the schematic below. Using either a multimeter or oscilloscope, measure voltage at locations V1 and V2. Current is then measured as I = (V1-V2)/R, where R = 3.3 Ohms, and power is measured as V1 x I. An example screen shot from an oscilloscope measurement is shown below. For this example, V1 = 2.94 Volts, V2 = 2.05 Volts, I = (2.94-2.05)/3.3 = 0.27 Amps, so power = 2.94 x 0.27 = 0.79 Watts. This was powering the red LED, and although this example does not show the full power capability of the LED or turbine, the 3W LED is extremely bright in this scenario.
Materials needed for the turbine: * 2x 2020 aluminum extrusions, 450mm length * 19:1 Metal Gearmotor 37Dx52L mm, (available from Pololu) * 400 mm loop, 6mm width GT2 timing belt * 14x M4 10mm bolts * 14x M4 Aluminum Extrusion T-nuts * 4x M3 10mm bolts (motor mount) * 4x M3 8mm bolts and nuts (motor/gear set screws) * 2x 608-ZZ bearings (aka skateboard bearings) * 5mm threaded rod (at least 5″ length) * 4x M5 nuts * 2x 5 gallon buckets (Home Depot sells some cheap ones) * 3/4″ PVC ball valve, and bulkhead. There are plenty of YouTube videos on “how to make a rain barrel” which can guide you through the process of installing a faucet to a bucket. You will want to pick up something with at least a 3/4″ opening though for lots of flow. Note that many garden hose bibbs reduce the flow, while the PVC ball valves have a much larger opening. * 3/4″ 90 deg elbow. I tried both a short turn and long turn elbow, and found that the long turn provided a huge advantage in water flow. Home Depot carries these in the electrical section under “conduit fittings”. * Wire and alligator clips A load is also required for the water turbine. The materials needed for a 3W LED load are: * 3W LED (we used an RGB LED so we could try different colors) * 3.3 Ohm resistor (at least 2 Watts) * 1000 uF capacitor, to smooth out voltage spikes from the generator
Be the first to review “Water Turbine Project Science Experiment” Cancel reply
Related products
Ready-Made Projects
Ready-Made Projects
Smart Load Management & Energy Meter Project | IOT Based Auto Billing System
Ready-Made Projects
5 DOF Profeesional Robotic arm With Gaming Joystick Control in Pakistan
Ready-Made Projects
Density Based Traffic Control Using Node Mcu Arduino Board | FYP Project | Iot Based









Reviews
There are no reviews yet.